It’s time to recount the story of how Anna McNuff and I made THE wedding cake.
Rewind to summer 2011...my sister, Sarah-Jane, had just got engaged to Anna’s brother, Jamie. Safe in the knowledge that Anna and I love to bake, the newly engaged couple asked us to make their wedding cake instead of buying them a gift. We naively accepted the challenge of mastering the art of wedding cakes – we had a year to practice, how hard could it really be!?
The date (
ahem deadline) was set. The cake was planned to stand in a reception dining hall on Sunday 26th August 2012 in front of 100+ wedding guests, some of which were professional bakers - no pressure!
In typical fashion, not much was done in the first 6 months, except for the purchase of a few wedding cake books and some sketching.
Along came 2012
The couple trusted us with all the design elements of the cake, but requested that it was a sponge cake rather than traditional fruit cake, preferably without marzipan too. This meant it would have to be made within 3 days of the wedding day to ensure freshness. Days were booked off work and we began our brainstorm...
Initial designs included an octagonal five tiered cake covered in sugar lace with intricate cascading hand-crafted edible flowers. However, it was decided that this was rather ambitious for our first time! We would try our hand at moulding edible flowers, but to keep in line with the bride’s square cut rock and the groom’s love of right angles and symmetrical objects (?), the cake would simply be four square tiers.
Next, the couple had decided on their wedding colour scheme and this would determine the type and colour of the flowers for the cake. To match bouquets and the bridesmaid dresses, the edible flowers would be shaped into cornflower blue roses and bright yellow sunflowers.
As maid of honour, cake design focus was shifted to hen do planning. Anna and I managed no more than three cake planning sessions before the final run. Only one weekend was hands-on...we bought the icing utensils, cake tins, ingredients and trialled moulding the flowers, different sponge recipes and fillings:
- We added liquid food colouring to traditional sugar paste for the flower petals and used edible dusting to add further detail. To our dismay, we discovered that the sugar paste we used became brittle after only an hour in the open air. A superior petal paste mix was used for the actual cake.
- Sponge trials were more successful as we settled on a simple vanilla Madeira sponge. Admittedly, our first sponge taste test was slightly too crisp due to summer hot tub distractions, but we made sure to resist when it came to the real deal!
Our original idea of white chocolate ganache filling was found to be too rich and unstable in between the sponge layers, even after mixing it with conventional butter cream icing. To still incorporate white chocolate into the cake, we chose to substitute the typical layer of marzipan with white chocolate plastique and to use plain butter cream icing with raspberry jam for the tier fillings.
Our first practice turned out average and we could only hope that lessons learnt would be enough, as the lack of time meant the final cake was next!
T minus 3 days
Anna and I had three days to create a beautiful four tiered wedding cake and we used virtually every minute working on it up until putting on our bridesmaid dresses on the day.
Dozens of sugar roses/sunflowers were sculpted before moving onto the sponge layers. This was our biggest challenge, as an even rise of the sponge during baking was never guaranteed. This was especially hard for the larger bottom tiers and we resorted to using a spirit level to avoid an ultimately skewed wedding cake! A few layers were not up to scratch and had to be re-baked, but thankfully this didn’t set us back too much.
We worked well into the evenings, whipping together vanilla butter cream and sandwiching this with a layer of raspberry jam between the sponges in each tier. The white chocolate plastique was rolled and cut to size and adhered to each layer with more jam ensuring that corners were sharp and edges of the tiers were as smooth as possible.
The final full day came around fast and it was time to cover the tiers in pure white icing and add structure to the cake. Each tier had been built onto a thin board, so plastic dowels were cut to size and inserted through each of the bottom three tiers to prevent any levels sinking into one another. We began stacking some tiers but kept the two halves of the cake separate, as this was more stable to transport to the venue. Thin white ribbon was added to the bottom of each tier.
Lastly...flower arrangement.
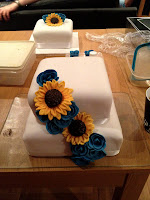
A homemade royal icing mix was used to fuse the sugar flowers to the tiers and without being able to have all tiers stacked, the positions of flowers were estimated using the cake tins as guides.
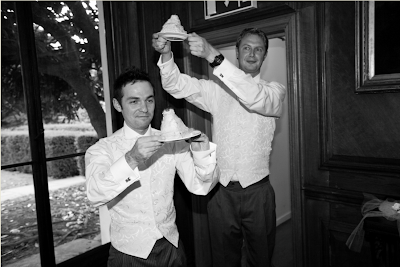
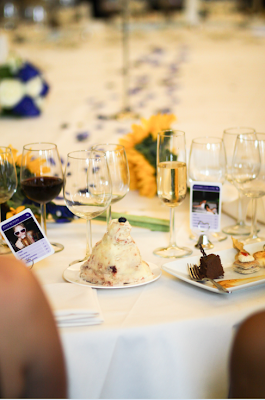
Now, you may be wondering why we used the same size cake tin as a guide for the smaller tiers in the picture above. The reason being was our smaller cake tins had strangely disappeared along with our electric mixer. We may have thought more of it at the time, had we not been so consumed with finishing! As it turned out, the groom and his brother, Jonty, had stolen these to make miniature tiered cakes as props in the groom’s wedding speech...beautiful.
WE DID IT!
Even though we unfortunately couldn’t stay with the bride the night before the wedding, we safely transported and assembled the cake at the reception venue in the morning, where it stood tall until the cake cutting!


